Updating Ticket Settings
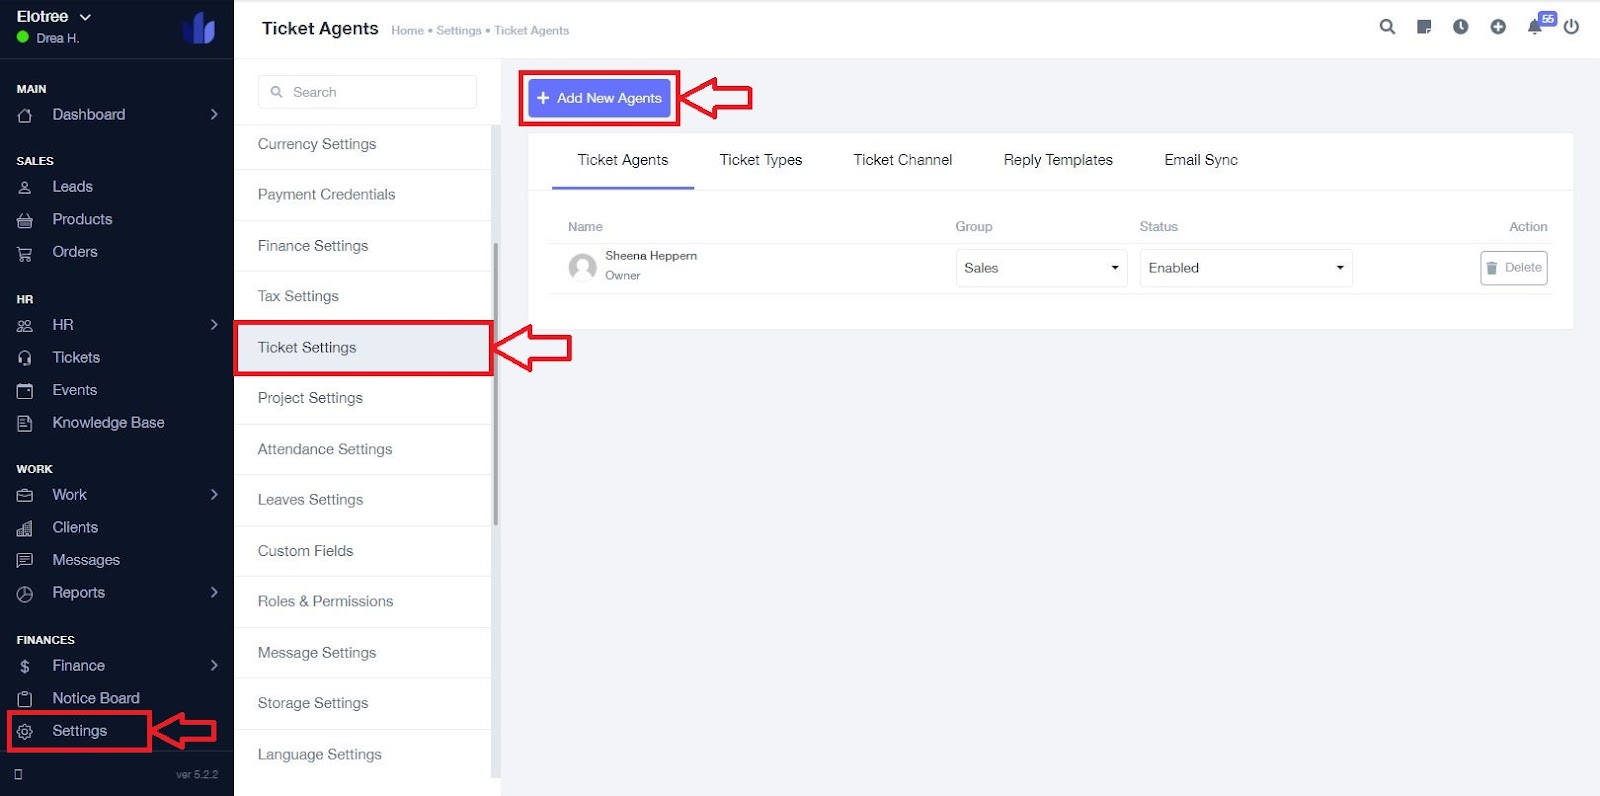
1. To configure ticket settings on Elotree, click on Settings on the left sidebar menu.
2. Click on “Ticket Settings” from the list of settings displayed on the left side of the screen.
Ticket Agents
3. The Ticket Agents tab displays a list of current ticket agents.
4. You can change the group an agent belongs to by selecting an option from the “Group” drop-down menu beside the agent’s name.
5. To enable or disable an agent, choose the applicable option from the “Status” drop-down menu beside the agent’s name.
6. To add new agents, click the “Add New Agents” button at the top left corner of the screen.
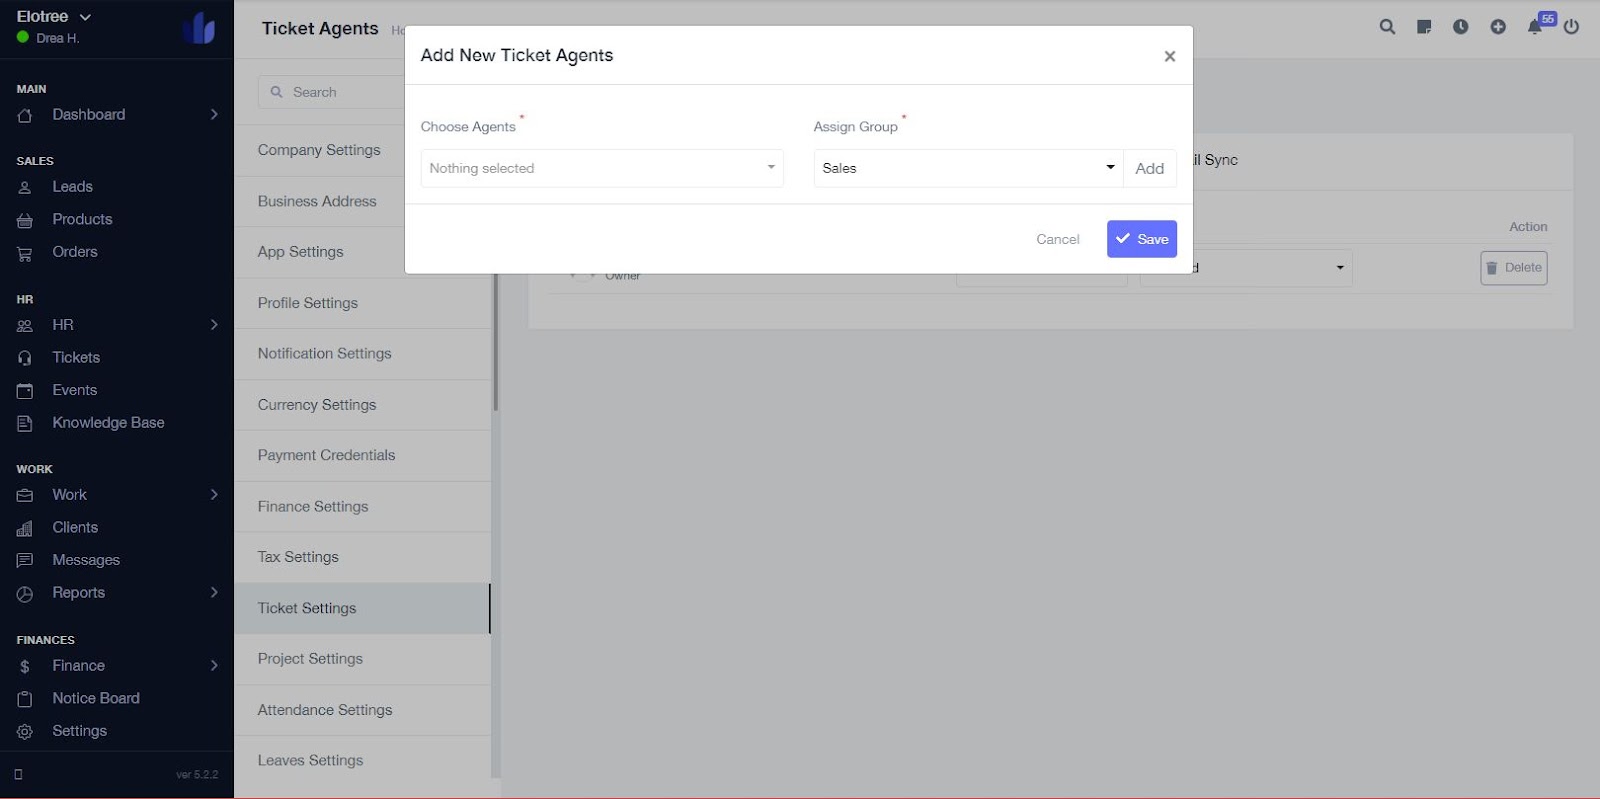
7. On the “Add New Agents” pop-up form, select a name from the drop-down menu under “Choose Agents”.
8. Assign the agent to a group from the corresponding drop-down menu.
9. Click on the “Save” button at the bottom right corner of the page to save your new Ticket Agent.
Ticket Types
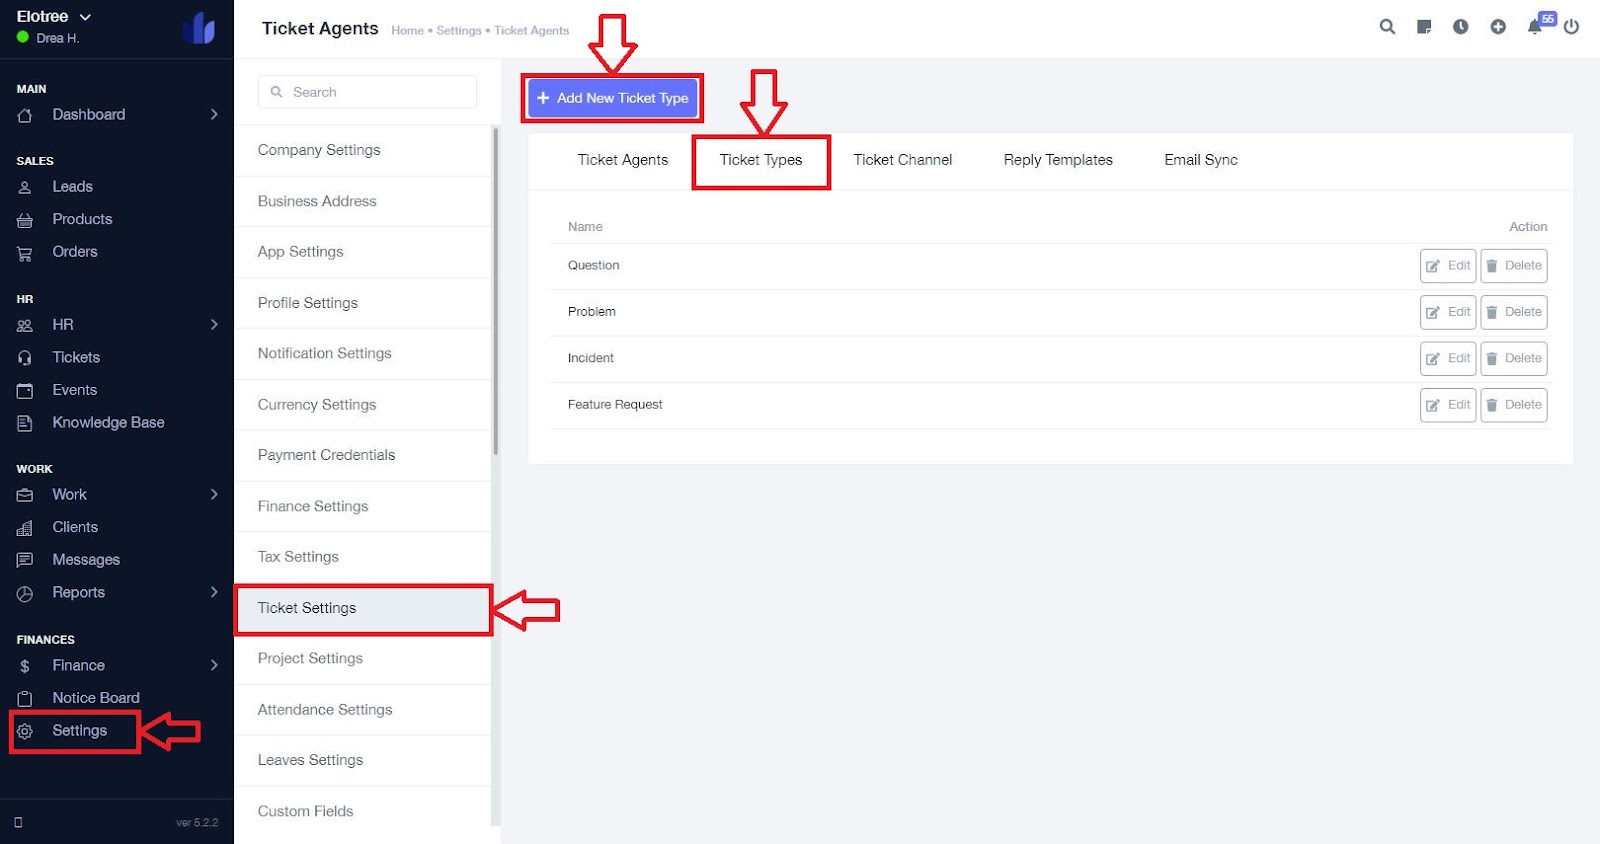
1. To manage your existing ticket types, click the Ticket Type tab at the top of the page.
2. A list of all current ticket types is displayed.
3. Click the “Edit” button beside a ticket type to update the ticket type.
4. To add a new ticket type, click the “Add New Ticket Type” button at the top left corner of the screen.
Ticket Channel

1. To manage or add to your existing ticket channels, click the Ticket Channel tab at the top of the page.
2. A list of all current ticket channels is displayed.
3. Click the “Edit” button beside a ticket channel to update the ticket channel.
4. To add a new ticket channel, click the “Add New Ticket Channel” button at the top left corner of the screen.
Reply Templates
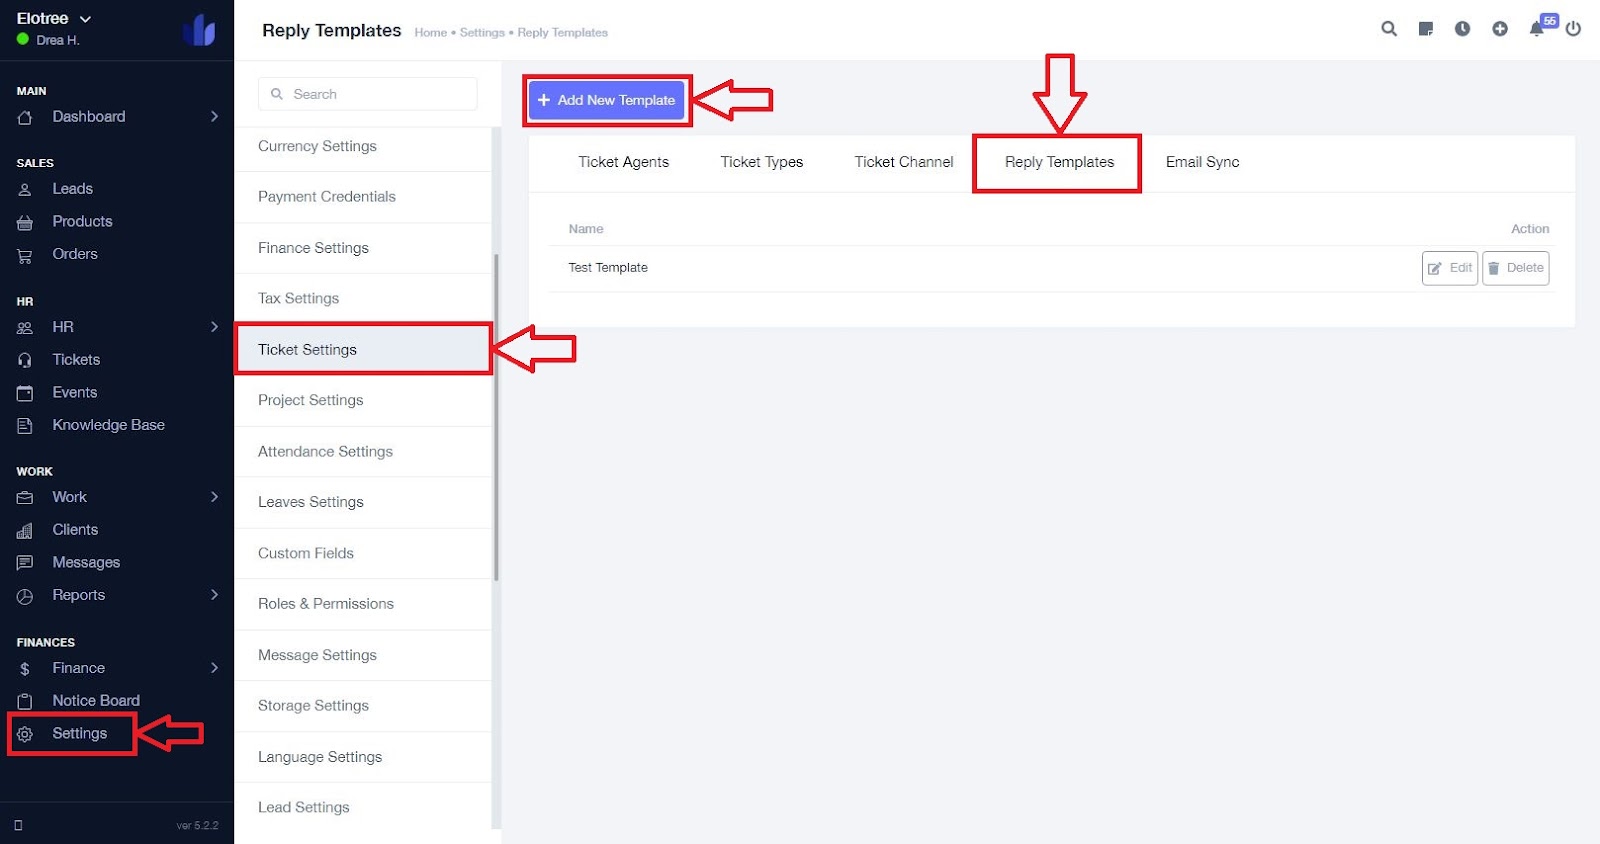
1. To manage or add to your existing reply templates, click the Reply Templates tab at the top of the page.
2. A list of all current reply templates is displayed.
3. Click the “Edit” button beside a ticket channel to update the reply template.
4. To add a new reply template, click the “Add New Template” button at the top left corner of the screen.
Email Sync
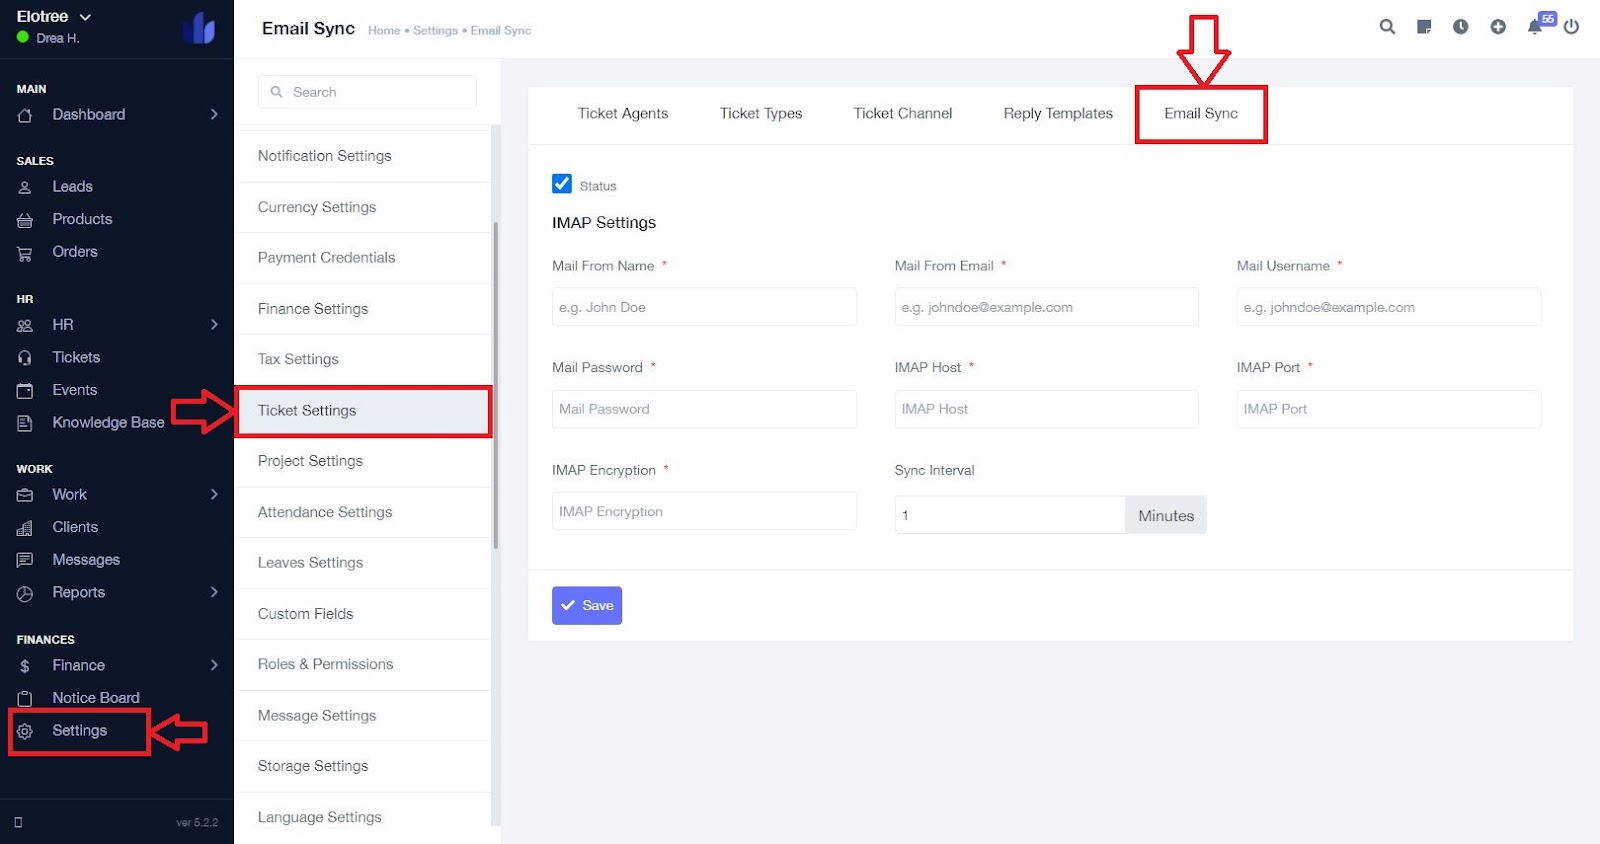
1. To enable and configure email sync, click the Email Sync tab at the top of the page.
2. Tick the “Status” checkbox to enable email sync and reveal its configuration settings.
3. Fill in all the required fields.
4. Click “Save” to save your configuration.