Updating Finance Settings
1. To configure your invoice format on Elotree, click on Settings on the left sidebar menu.
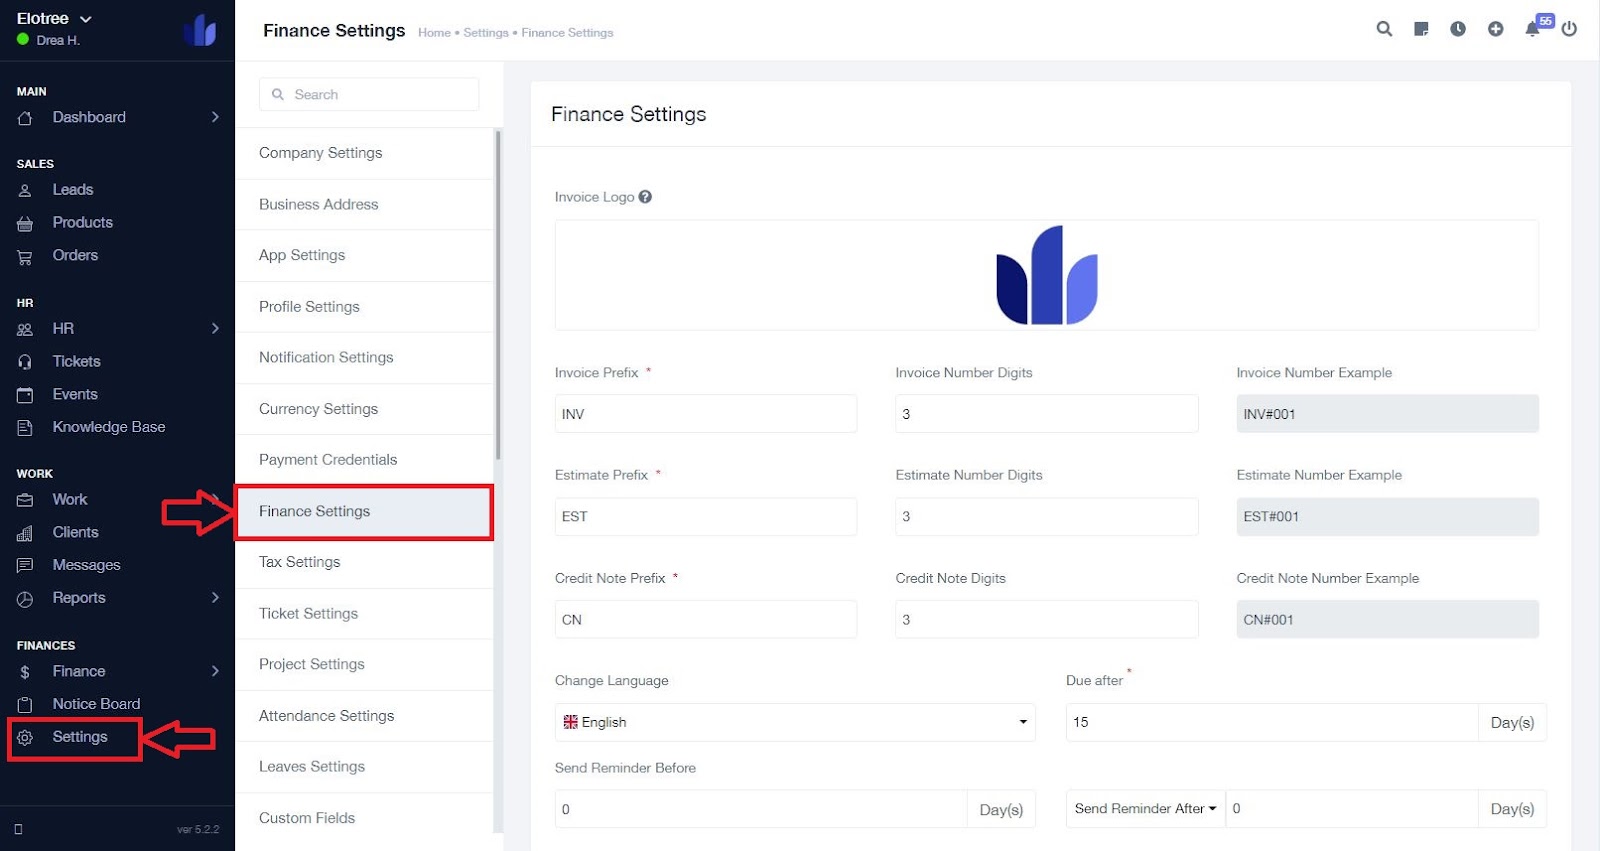
2. Click on “Finance Settings” from the list of settings displayed on the left side of the screen.
3. On the Finance Settings screen, click the “Invoice Logo” field to upload the logo to appear on any generated invoice.
4. In the “Invoice Prefix” field, specify an identifier that you would like to always precede the invoice number.
5. In the “Invoice Number Digits” field, specify the number of digits the invoice number should take. For example, if you fill in “3”, an invoice number would appear as “001”.
6. From your inputs in the last two entries, you will see an example of what an invoice number would look like in the “Invoice Number Example” field.
7. In the “Estimate Prefix” field, specify an identifier that you would like to always precede the Estimate Number.
8. In the “Estimate Number Digits” field, specify the number of digits the Estimate Number should take. For example, if you fill in “3”, an Estimate Number would appear as “001”.
9. From your inputs in the last two entries, you will see an example of what an Estimate Number would look like in the “Estimate Number Example” field.
10. In the “Credit Note Prefix” field, specify an identifier that you would like to always precede the Credit Note Number.
11. In the “Credit Note Digits” field, specify the number of digits the credit note number should take. For example, if you fill in “3”, a credit note number would appear as “001”.
12. From your inputs in the last two entries, you will see an example of what a credit note number would look like in the “Credit Note Number Example” field.
13. Set the language to use in invoices under the “Change Language” section.
14. Under “Due after”, specify how many days after the creation of an invoice before it becomes due.
15. Specify when and how often reminders should be sent.

16. Tick the applicable checkbox(es) if you wish to show tax number, HSN/SAC code, and/or tax calculation message on invoices.
17. Select a template to use from the available options.
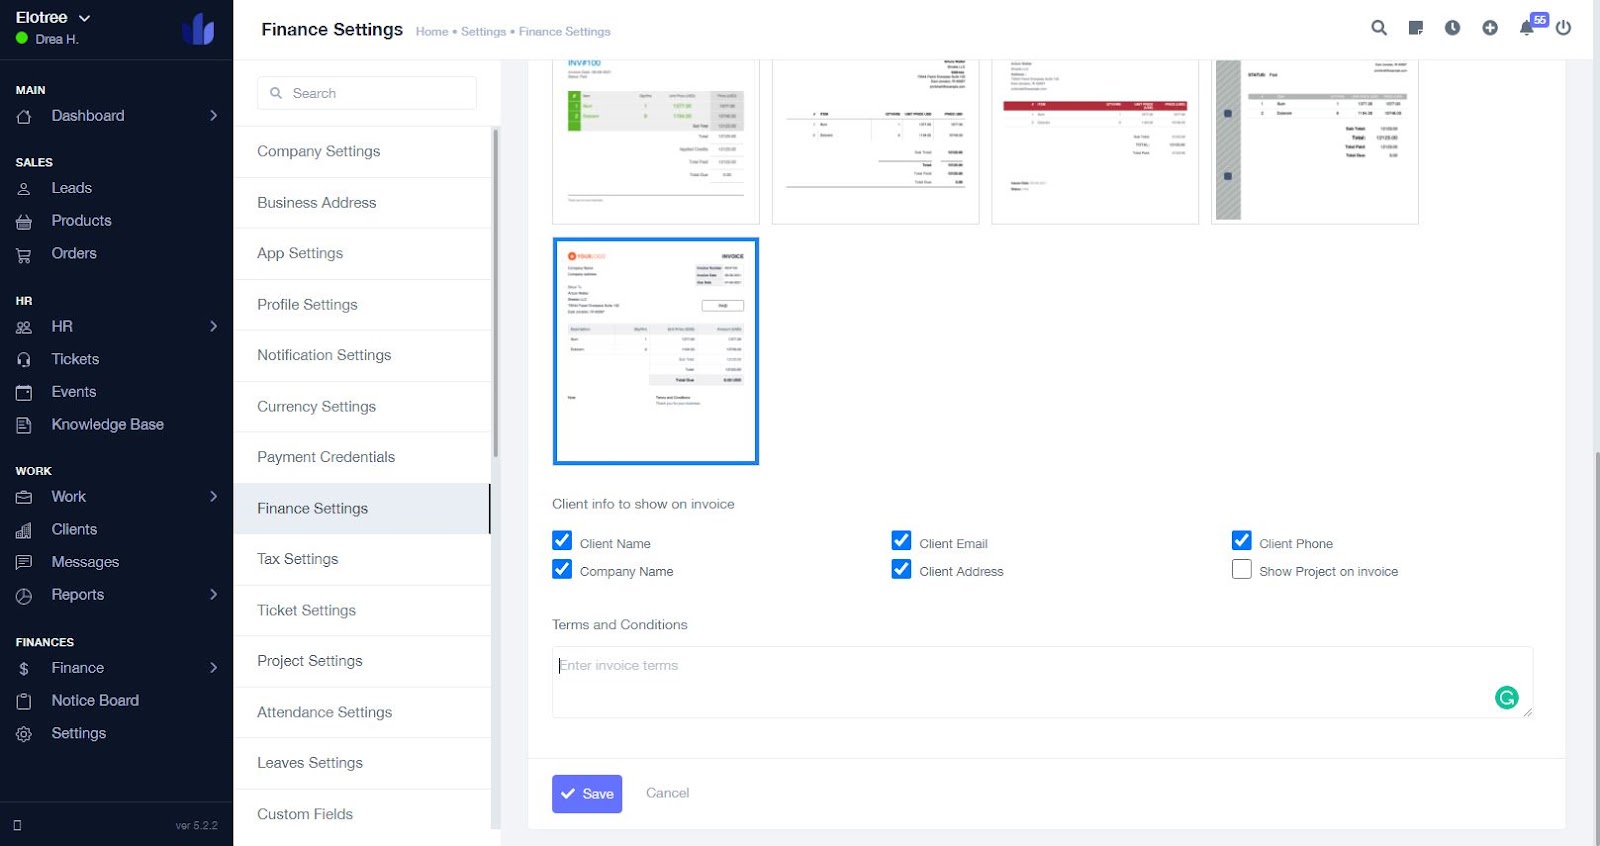
18. Tick the applicable checkbox(es) to select the client information you wish to include on invoices.
19. In the “Terms and Conditions” field, enter invoice terms and conditions as they would appear on invoices.
20. Click “Save” at the bottom of the page to save your changes.