How can we help you today?
Updating Your Notification Settings
- To update your notification settings, click on “Settings” on the left sidebar menu.
- Click on “Notifications Settings” from the list of settings displayed on the left side of the screen.

- To configure your email and set up email notifications, click on the “Email” tab at the top of the screen.
- Add the name you want to appear on your sent emails in the “Mail From Name” field.
- Add the email address you want to send emails from in the “Mail from Email” field.
- Select whether to Enable Email Queue from the corresponding drop-down menu. Note that enabling email queue speeds up the emailing process.
- Select the Mail Driver you wish to use – Mail or SMTP.
- Type your Mail Host address and Mail Port number in the corresponding fields, and select a Mail Encryption type.
- Type in your Mail Username and Mail Password in the corresponding fields.
- On the right side of the page, under Email Notification Settings, tick the checkboxes that you wish to have email notifications sent for.
- Click the “Send Test Email” button at the bottom of the screen to test your configuration with a test email.
- Click the “Save” button at the bottom of the screen to save your changes.
Slack

- To configure Slack and set up Slack notifications, click on the “Slack” tab at the top of the screen.
- Tick the “Status” checkbox at the top of the screen.
- Fill in the Slack Webhook address in the corresponding field.
- Click the field below “Notification Logo” to upload a logo to appear on the notifications.
- On the right side of the page, under Slack Notification Settings, tick the checkboxes that you wish to have Slack notifications sent for.
- Click the “Send Test Notification” button at the bottom of the screen to test your configuration with a test notification.
- Click the “Save” button at the bottom of the screen to save your changes.
Push Notification
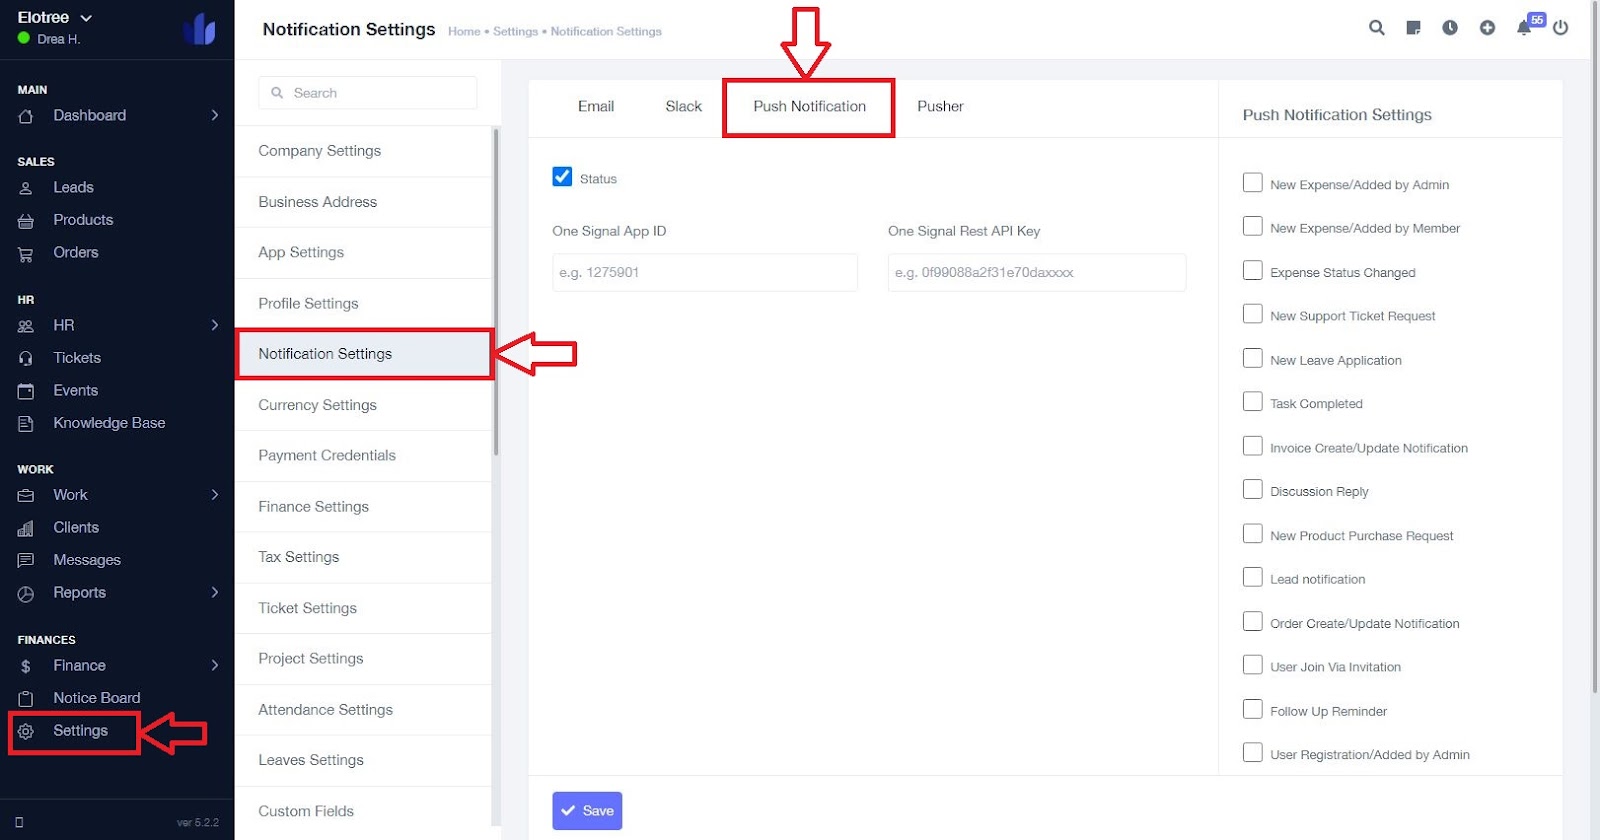
- To set up push notifications, click on the “Push Notification” tab at the top of the screen.
- Tick the “Status” checkbox at the top of the screen.
- Fill in the One Signal App ID and One Signal Rest API Key in the corresponding fields.
- On the right side of the page, under Push Notification Settings, tick the checkboxes that you wish to have push notifications sent for.
- Click the “Save” button at the bottom of the screen to save your changes.
Pusher
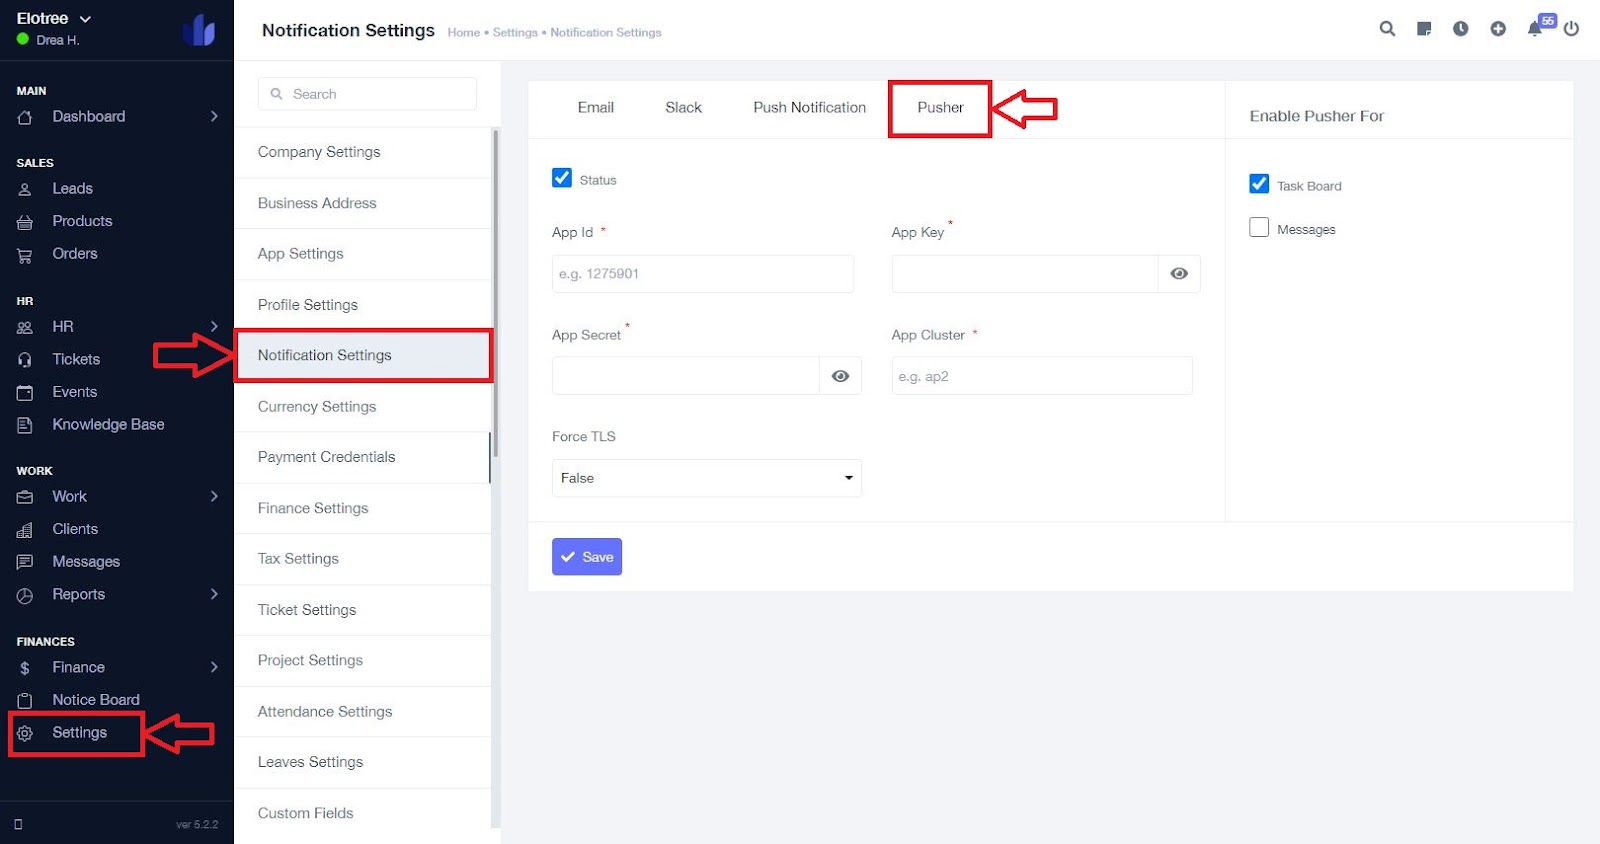
- To configure Pusher and set up Pusher notifications, click on the “Pusher” tab at the top of the screen.
- Tick the “Status” checkbox at the top of the screen.
- Fill in the App Id and App Key in the corresponding fields.
- Fill in the App Secret and App Cluster in the corresponding fields.
- Select a “Force TLS” value.
- On the right side of the page, under Enable Pusher For, tick the checkboxes that you wish to have Pusher enabled for.
- Click the “Save” button at the bottom of the screen to save your changes.