How can we help you today?
Adding a Sub-Task
Creating sub-tasks makes it easy to split up tasks into even smaller pieces. You can add a sub-task by following the steps below.
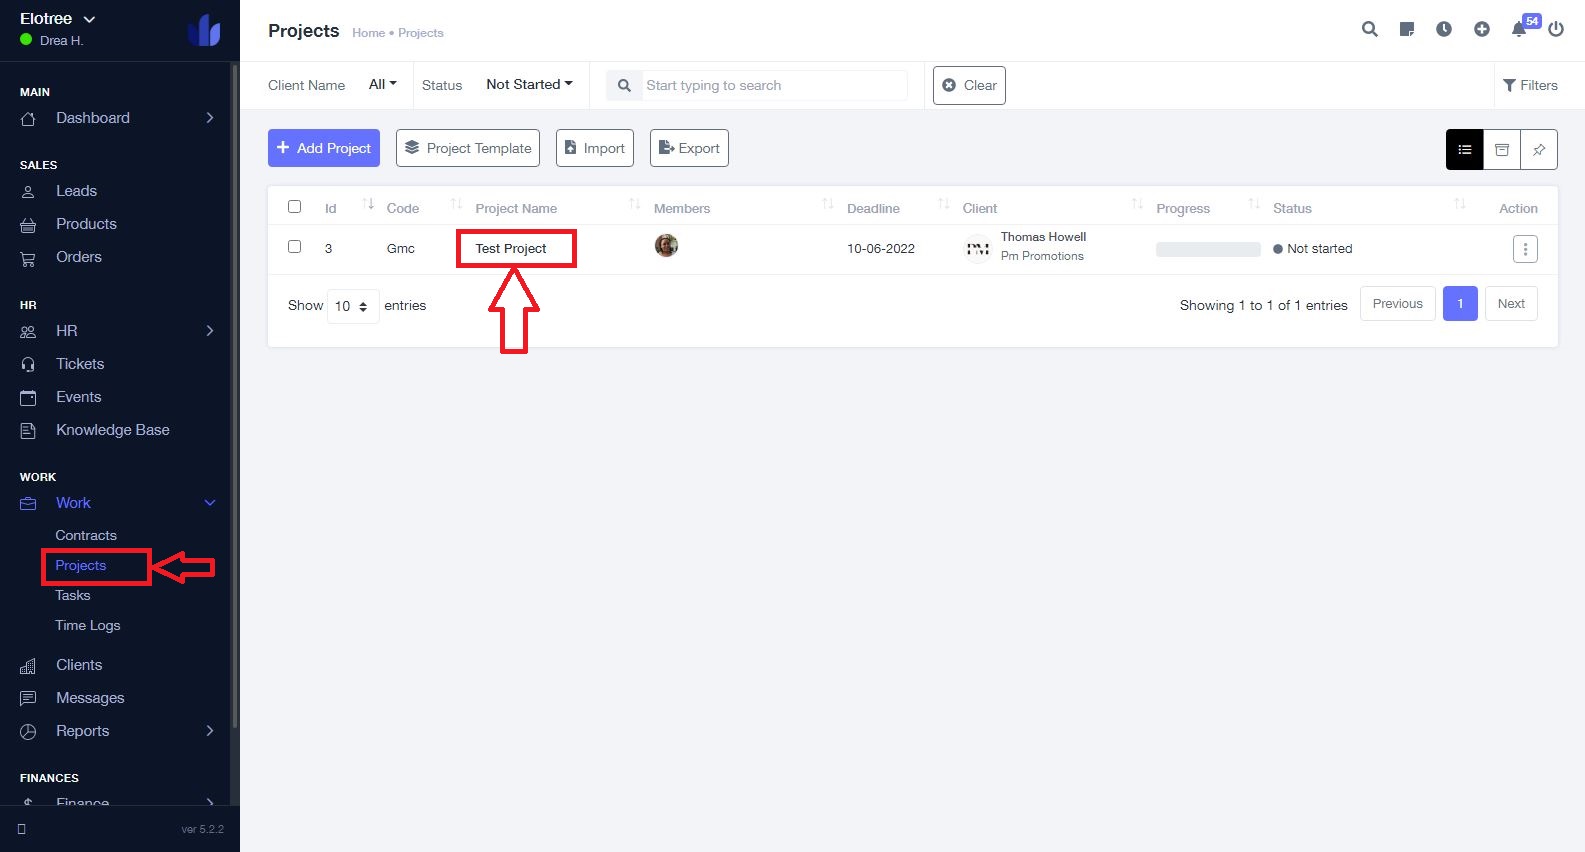
- Click on “Projects” on the left sidebar menu.
- From the list of projects on the Projects page, click on the project containing the task you wish to create a sub-task for.
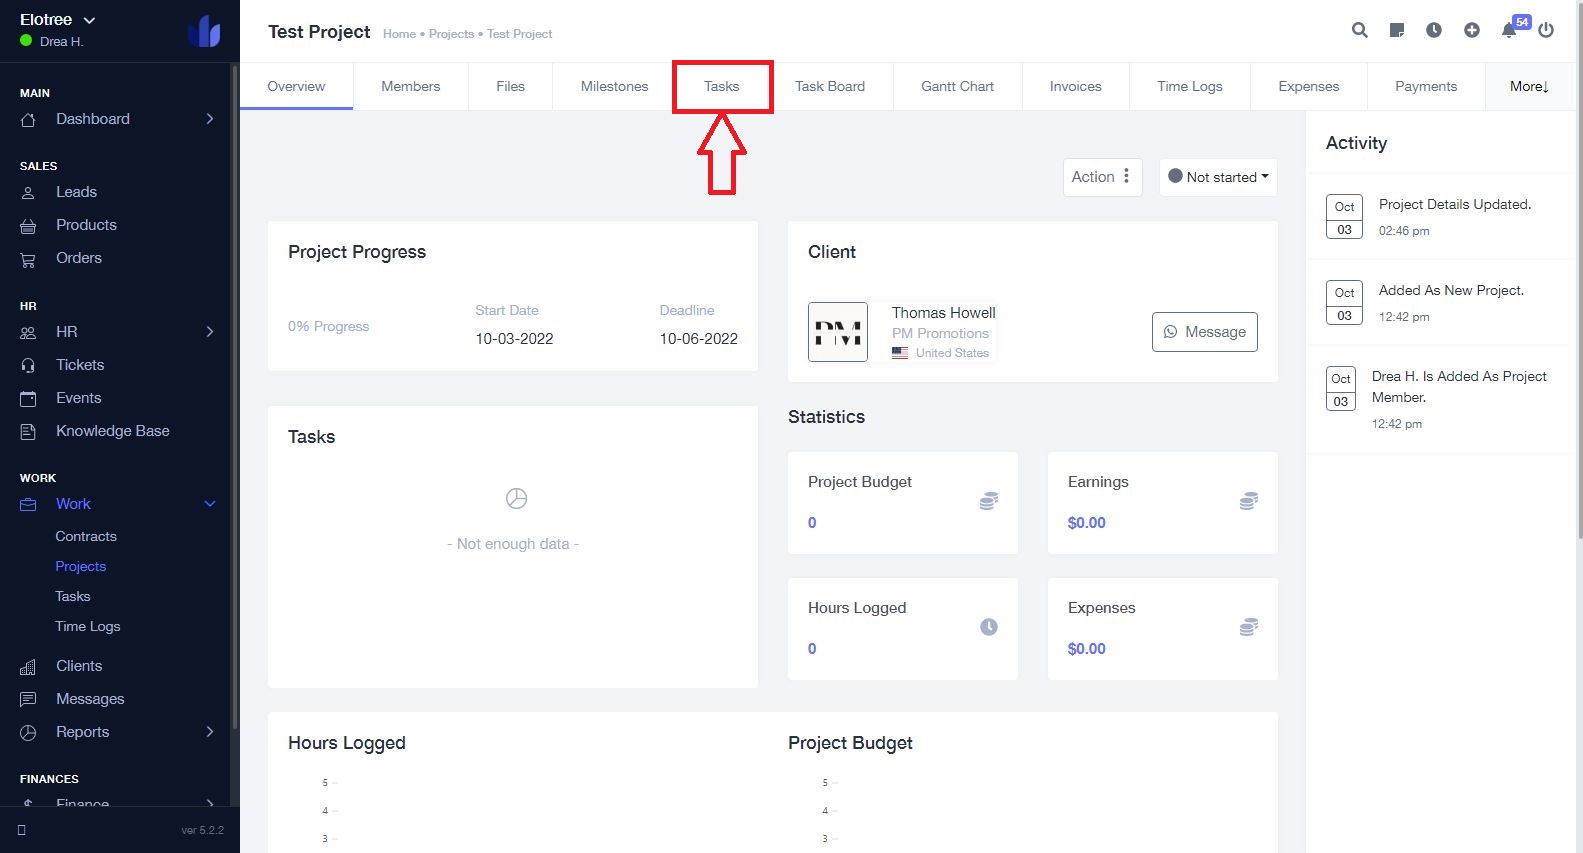
- Click on “Tasks” from the tabs located at the top of the project page.
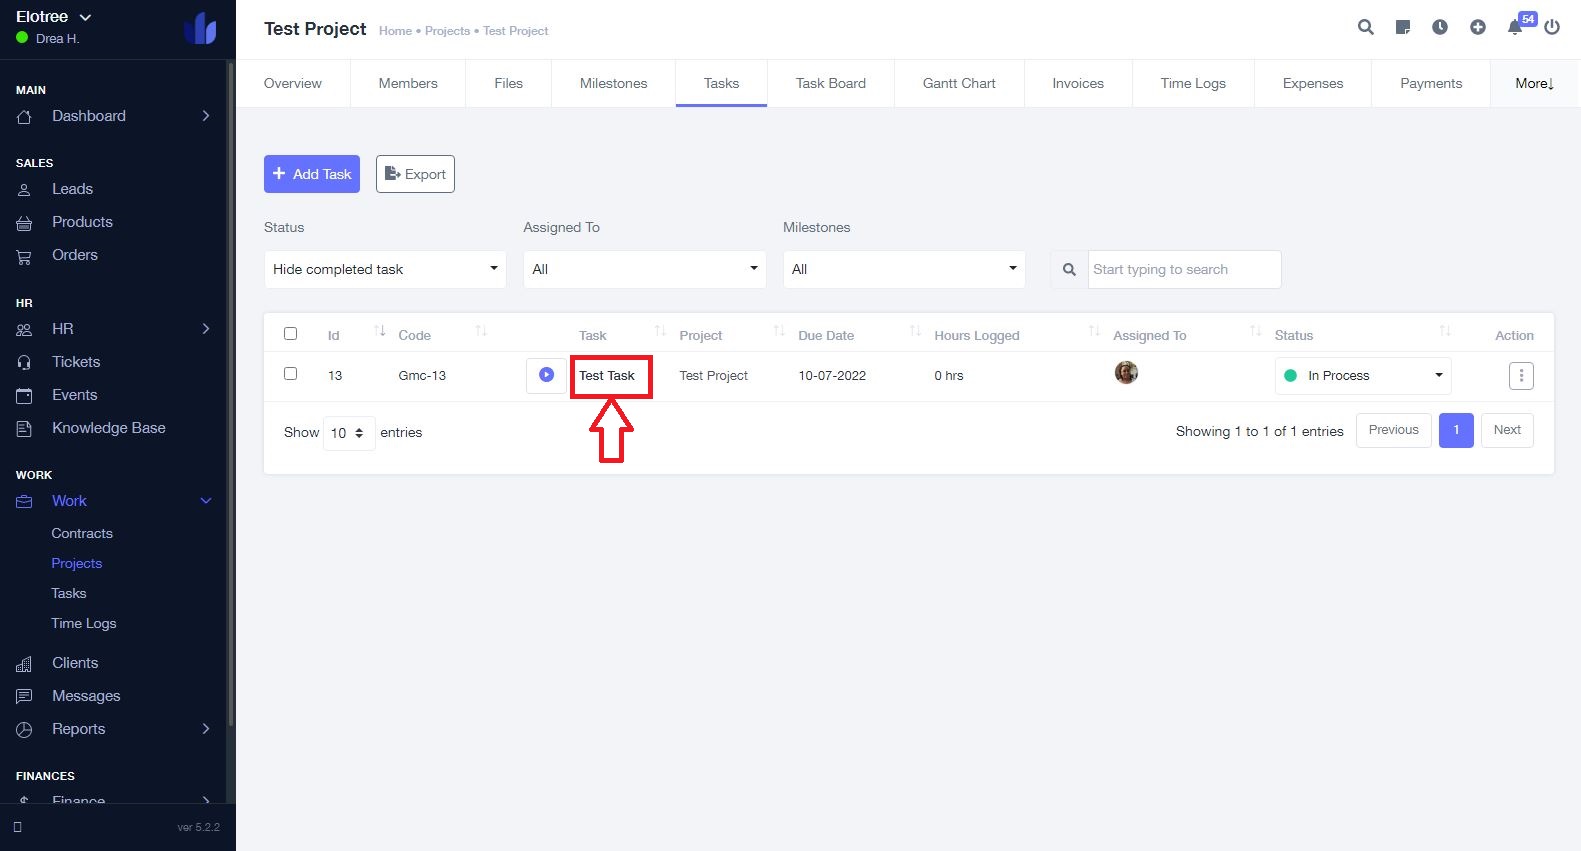
- Click on the task you wish to create a sub-task for.
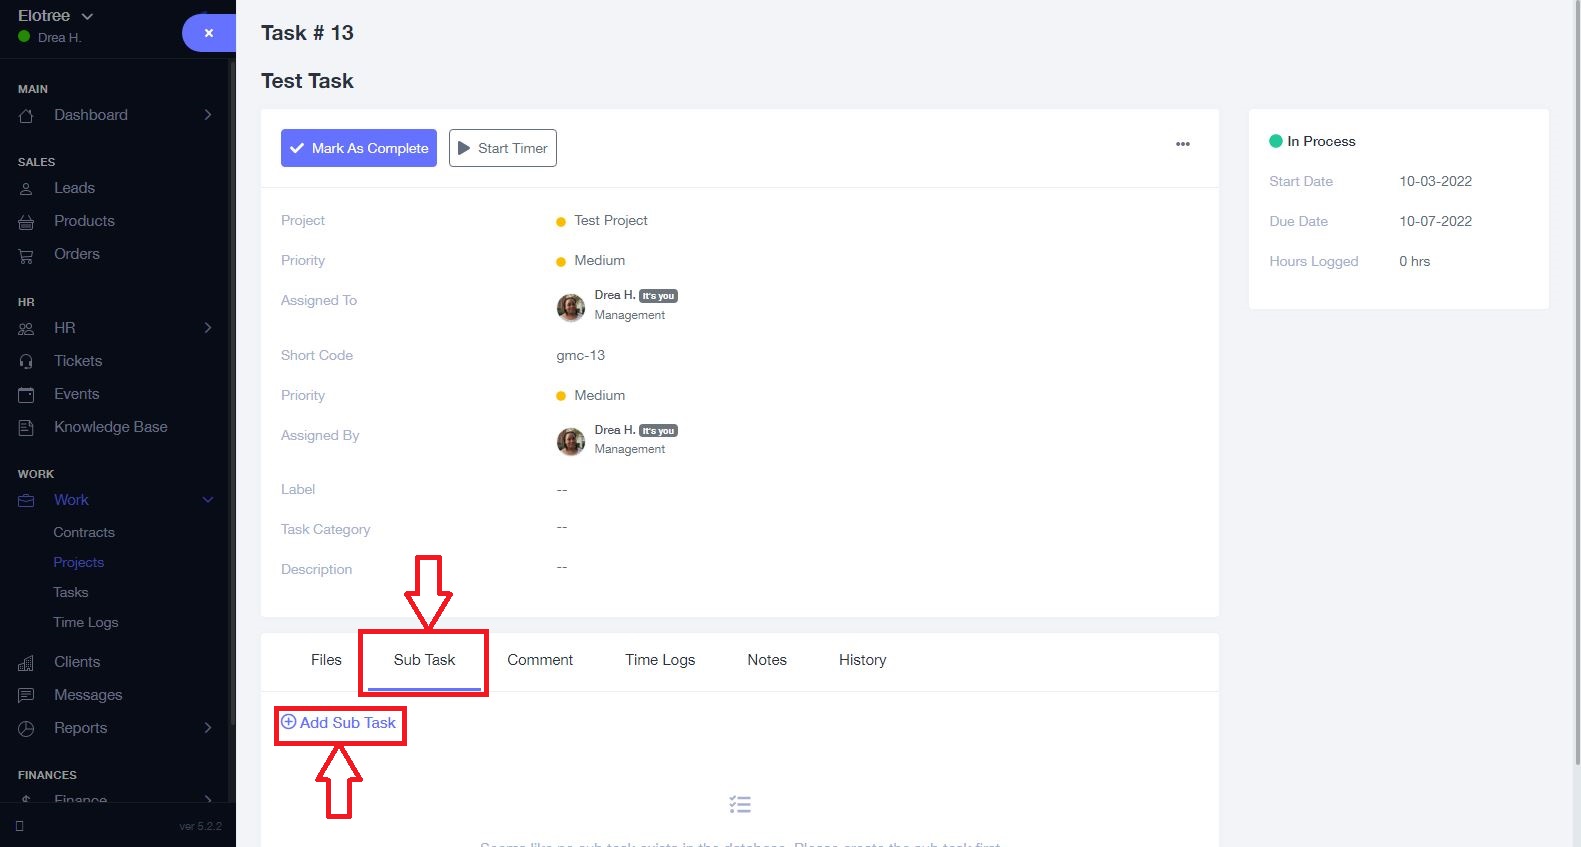
- Click “Sub Task” from the tabs located at the bottom of the page and then click “Add Sub Task”
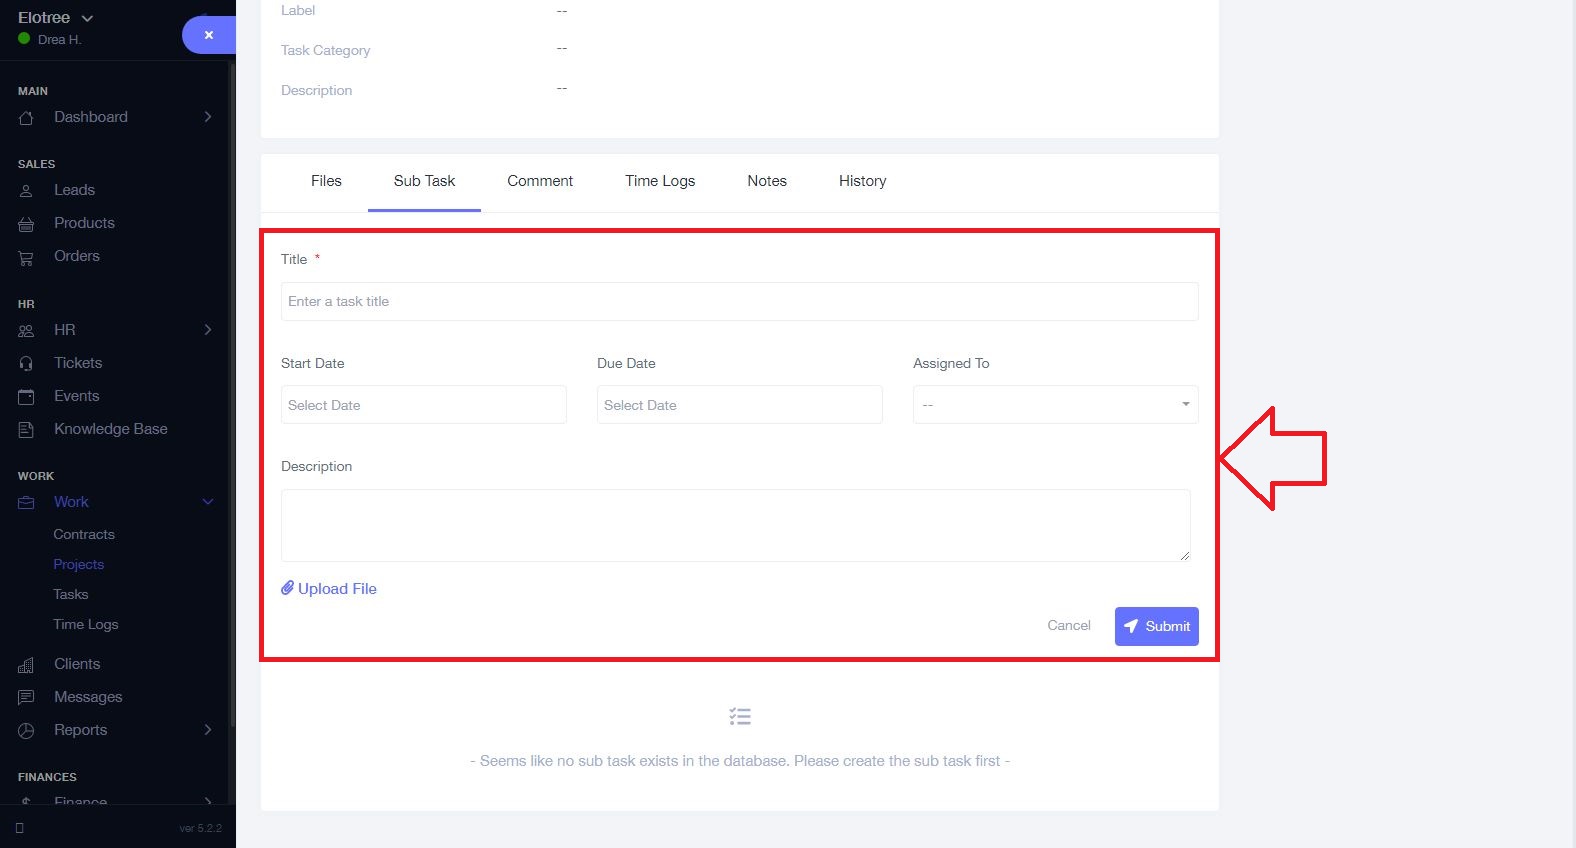
- Enter the sub-task title in the “Title” section.
- Enter the applicable dates in the “Start Date” and “Due Date” sections.
- Add assignee(s) from the “Assigned To” drop-down options. Note that only members added to the main task will be visible here.
- Enter a description of the sub-task in the Description section and upload any relevant file.
- Click on the “Submit” button to create the sub-task and exit.